Chapter 4
4.2. OAuth 2.0
OAuth 2.01 is the second evolution of the OAuth protocol. It has a couple of advantages over the first version.
- OAuth 2 is simpler and easier. The steps are reduced and there are no complex signing process. Not using signatures to validate requests has however been an argument against OAuth 2. This is considered to be less secure. OAuth 2 relies on the use of SSL to ensure tokens are securely sent. (The specification strongly recommends all provider endpoints to be on SSL).
- OAuth 2 scales better. With OAuth 1, a lot of resources can go into state management and signature validation for every request at the provider end.
- There is better support for non-browser based applications. Remember, with OAuth 1 the user is redirected to the authorization URL (in a browser) and is redirected back to the consumer’s callback URL on authorization (still within the browser). This makes it hard2 for non-browser clients, desktop clients as one, to be able to implement OAuth 1. OAuth 2 solves this by providing different grant types for different use cases.
OAuth 2.0 generally involves two steps.
- The user is redirected to the provider for an authorization code
- The consumer exchanges the code for an access token
Unlike OAuth 1 however, the process differs according to the grant type. In step 2, the provider MAY also issue a refresh token. Refresh tokens are used to obtain new access tokens when the current one expires or becomes invalid.
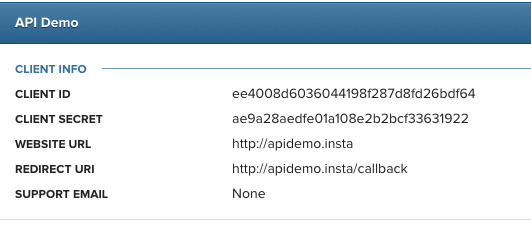
Let’s look at the grant types and the process for each. Don’t forget that the OAuth registration comes first and the consumer gets a client id and secret.
The available grant types are:
- Authorization Code
- Implicit
- [Resource Owner] Password Credentials
- Client Credentials
Providers may support one or more of the grant types. Authorization Code and Implicit grant types are the most supported ones.
1. Authorization Code
This is used by browser-based consumers that can handle browser redirects and can keep their client id and secret confidential.
The first step is that the consumer redirects the user to the authorization endpoint with the following parameters (as supported and documented by the provider):
response_type- value must be codeclient_idredirect_uri- this is the callback URL the user will be redirected from the authorization URL. Optional.scope- the scope of authorization. This defines what the consumer is requesting access to? Photos? Likes? Followers? The available scopes will be provided by the provider. This is different from OAuth 1. In OAuth 1, the scope is specified during the application registration process: In OAuth 2, the client specifies the required scope during the authorization request.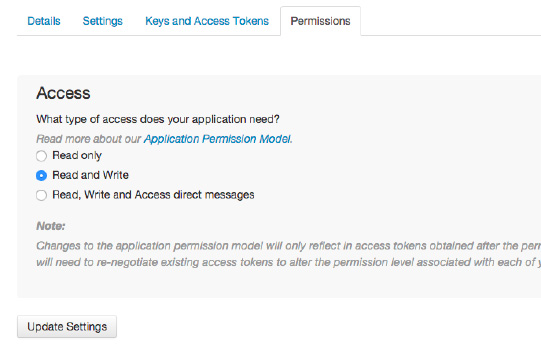
state- a value the consumer sends to the provider and expects to be sent back to the redirect url. The consumer uses this to maintain states between the request and callback to prevent unauthorized request by a third-party disguising as the consumer. The consumer checks this when the user is redirected back to be sure it matches what was sent initially. This helps ensure the callback redirection is not from the wrong source. The parameter is optional but recommended.
Here is a sample authorization URL with the parameters:
https://api.instagram.com/oauth/authorize/?client_id={CLIENT_ID}&redirect_uri={REDIRECT_URI}&response_type=code&scope={SCOPE}&state={STATE}The authorization URL presents the user an authorization page where the user gets to allow or deny access the consumer access.
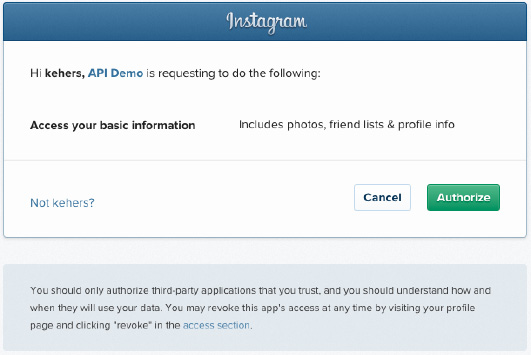
The user is then redirected back to the redirect_uri with an authorization code, if he chooses to allow, or an error if he denies.
https://redirect-uri?code={CODE}&state={STATE}The second step is to request the access token with the code. These are the parameters used for the next access token request.
grant_type- Value must be authorization_codecode- Code received from authorizationclient_idclient_secretredirect_uri- This is the callback URL the user will be redirected from the authorization URL. Optional.
POST /oauth/access_token
Host: api.instagram.com
Content-Type: application/x-www-form-urlencoded

grant_type=authorization_code&code={CODE}&redirect_uri={REDIRECT_URI}&client_id={CLIENT_ID}&client_secret={CLIENT_SECRET}
The provider in turn replies with the access token in a response body similar to this:
{"access_token":"2YotnFZFEjr1zCsicMWpAA"}2. Implicit
In the authorization code grant type above, the client secret is posted with other parameters to obtain the access token. But remember, the client secret must be kept confidential so this is only feasible in server side consumers that can make POST request in a way the user can’t see, unlike pure client-side (e.g. javascript) consumers. The implicit grant type allows pure client-side consumers request access token without sending their client secret. The way it works is that the user is redirected to the authorization URL as is in the authorization grant type; just that this time, the response_type parameter will have the value token
https://instagram.com/oauth/authorize/?client_id={CLIENT-ID}&redirect_uri={REDIRECT-URI}&response_type=tokenThe provider returns the access token directly and not an authorization code this time around. So the step where the authorization code is exchanged for access token and the client secret is sent with other parameters is completely out of the flow.
https://redirect-uri#access_token={ACCESS_TOKEN}3. Password Credentials
This grant type allows the consumer exchange the user’s username and password for an access token directly. It is recommended to be used for consumers that are highly trusted by the provider only. Or apps created by the provider itself.
POST /oauth/token
Host: api.provider-site.com
Content-Type: application/x-www-form-urlencoded

grant_type=password&username={USERNAME}&password={PASSWORD}&client_id={CLIENT_ID}
4. Client Credentials
Here, the consumer can directly exchange the client id and secret for an access token.
POST /oauth/token
Host: api.provider-site.com
Content-Type: application/x-www-form-urlencoded

grant_type=client_credentials&client_id={CLIENT_ID}&client_secret={CLIENT_SECRET}
-
Making authenticated requests
Once the consumer has the access token, it can now be used to request resources that require authorization. This can be done by passing the access token through the Authorization header, POST body parameter or URI query parameter of a GET request. These are the same methods used in OAuth 1.0.
The format of the Authorization header is:
Authorization: Bearer access_tokenHere is an example of using the Authorization header:
GET /me
HOST: graph.facebook.com
Authorization: Bearer PhJTNqTdQb2
Although not specified on the Instagram developer site, Instagram does not support using Authorization headers. The other methods work. Here is an example of using URI query parameter to request a user profile:
GET /v1/users/1574083/?access_token=51624076.f59def8.eee28c2fb41f4b07b0
HOST: api.instagram.com-
RFC 6749: http://tools.ietf.org/html/rfc6749 ↩
-
Some providers have workarounds for this. An example is Twitter’s PIN-Based OAuth (https://dev.twitter.com/oauth/pin-based) ↩